
The 60-Second Read
Your cold plunge thermometer is the most underrated piece of gear you own. Most plungers trust whatever number their tub display or a cheap stick-on strip shows — and that number is often wrong by 3–8°F.
- Best all-rounder: a digital probe thermometer, mid-depth, given 60–90 seconds to stabilize.
- Biggest mistake: measuring right where the ice was dumped or next to the chiller outlet.
- Free accuracy check: a properly made ice bath should read exactly 32°F (0°C). If yours doesn’t, your thermometer needs attention.
Below: the 7 ways to measure, ranked — plus placement rules, calibration, and the mistakes I made so you don’t have to.
I’ll be honest with you: for my first three months of plunging, I had no idea how cold my water actually was. My tub’s little digital display said 50°F (10°C), and I believed it the way you believe a bathroom scale when it gives you good news. Then a friend who homebrews beer lent me his lab-grade probe, I dropped it in the middle of the tub, waited a minute — and watched it settle at 58°F. Eight degrees off. I’d been humble-bragging about my “50-degree plunges” to anyone who’d listen, and the whole time I’d basically been taking a brisk bath.
That stung. But it taught me something no cold plunge thermometer marketing copy will tell you: the number on the screen is a claim, not a fact. And when the whole point of your practice is precise cold exposure — when the difference between a beginner-friendly 59°F and a genuinely intense 50°F changes everything about the session — an honest measurement matters more than almost any other piece of gear. That’s what this guide is: everything I wish someone had handed me on day one about measuring cold plunge water temperature accurately.
01Why Your Cold Plunge Thermometer Might Be Lying to You
Before we rank the tools, let’s talk about why readings go wrong in the first place. Every one of these has bitten me personally:
1. Cheap sensors drift. Budget thermometers — especially the freebie that came with your tub or a $4 stick-on strip — use low-grade thermistors that drift over time. A degree here, a degree there, and suddenly your “consistent routine” isn’t consistent at all. If you’ve never checked yours against a known reference, you don’t actually know what you’re plunging in.
2. Placement is everything. Water in a still tub stratifies. The spot right where you dumped yesterday’s ice can read 5°F colder than the middle of the tub. The corner next to the chiller return reads colder than the far end. I once measured three spots in my own tub within two minutes: 47°F, 52°F, and 55°F. Same water. Three “temperatures.”
3. Infrared guns read the surface, not the water. Point-and-shoot thermometers are satisfying — instant number, no wet hands. But they measure infrared radiation off the surface, which is influenced by air temperature, steam, and angle. On a breezy morning, the surface can read several degrees warmer than the water your body is actually sitting in.
4. Dying batteries lie quietly. A digital thermometer with a fading battery doesn’t usually flash a warning — it just starts reading a degree or two high or low. If your readings have been “creeping” lately, check the battery before you blame the chiller.
5. Built-in sensors measure the wrong spot. Your chiller’s display shows the temperature at its sensor — usually at the water outlet or inside the unit. That’s useful for the machine, but it’s not the temperature at your chest, in the middle of the tub, where you actually are. Think of it like a thermostat in the hallway telling you the bedroom is warm.
Why does a few degrees even matter? Because cold exposure follows a dose-response curve: the physiological stress of 50°F water is meaningfully greater than 59°F. Our cold plunge temperature chart breaks down the right range for every goal — but every one of those ranges assumes your measurement is honest. An 8-degree error (like mine was) can quietly move you an entire zone on the chart.
02The 7 Ways to Measure Cold Plunge Temperature, Ranked
I tested or lived with every method below over two years — some for a week, some permanently. Ranked by the only metric that matters: do you get a number you can trust?
1Digital probe thermometer — the honest workhorse
A handheld digital thermometer with a metal probe on a cable is, in my opinion, the single best cold plunge thermometer for most people. You drop the probe mid-tub, wait 60–90 seconds for the reading to stabilize, and you get accuracy around ±1°F — often better. They’re cheap ($12–$25), the batteries last forever, and there’s no app to update or subscription to forget. Mine lives on a hook next to the tub, and it’s the one I reach for when something feels “off” about the water.
How to use it right: submerge the probe at least 2 inches, hold it in the center of the tub at mid-depth, and don’t touch the tub walls — they conduct ambient heat and skew the reading.
2Floating thermometer — the always-on sentinel
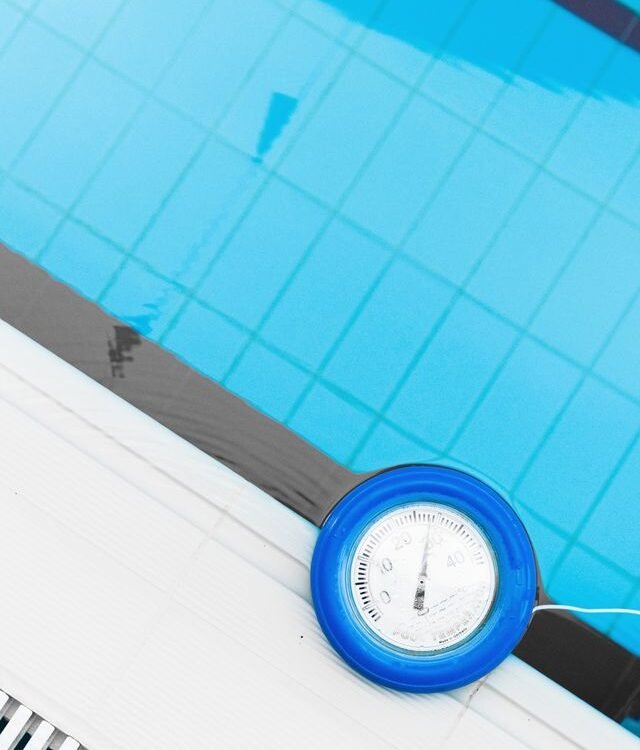
The classic pool thermometer on a string. It bobs around giving you a constant reading, which is genuinely useful — you glance at it before stepping in, no ritual required. The trade-off: it measures the surface layer, which on a sunny day can run warmer than the water at your core. Accuracy is typically ±2°F. I keep one in the tub as a quick-look backup, but I never trust it alone before an important session.
3Infrared (non-contact) thermometer — fast but fool-able
Point, click, instant number. Irresistible — and misleading if you’re careless. IR guns read thermal radiation from the water’s surface, so steam, wind, and even the angle of your wrist change the number. That said, they’re great for quick spot-checks (“is the far corner colder than the near corner?”). If you go this route, verify it against a proper ice bath first — ThermoWorks publishes an excellent guide to calibrating infrared thermometers with a properly made ice bath that walks through the emissivity settings most people ignore.
4Smart WiFi/Bluetooth thermometer — the data nerd’s pick
These float in the tub and beam readings to your phone, with graphs, alerts (“water’s ready!”), and history. Genuinely delightful if you run a chiller and want to know your tub hit 50°F while you’re still making coffee. Accuracy is usually ±1°F — solid — but you’re paying $40–$80, and you’re trusting a battery, a Bluetooth connection, and an app that may or may not exist in three years. Fun, not essential.
5Dial (bimetal) thermometer — analog and unhurried
The old-school needle gauge. No batteries, nearly indestructible, and accurate to about ±2°F when calibrated — many have a little nut on the back for adjustment. Downsides: they’re slow (give them 2–3 minutes), and reading a needle at an angle introduces parallax error. There’s something charmingly honest about them, though. My neighbor swears by his; he’s also the kind of man who still uses a paper map.
6Your chiller’s built-in display — convenient, verify it
If you run a chiller, its display is the number you see most. Treat it as a machine reading, not a water reading: the sensor typically sits at the outlet or inside the unit. When I compared my chiller’s display to a probe in the middle of the tub, they disagreed by 3°F — the chiller was reading its own cold output, not my actual bath. Our chiller sizing guide covers what to look for when buying, but whatever you own: verify the display against a probe at least once a season.
7Stick-on LCD strip — better than nothing, barely
Those color-changing strips you stick on the outside of the tub. They’re really measuring the tub wall, which lags the water and is warmed by the air outside. Typical accuracy: ±3–4°F on a good day, worse in sun or wind. I rank them last not to be mean, but because a confident wrong number is worse than an honest “I don’t know.” If a strip is all you have, use it — but upgrade to a $15 probe as soon as you can.
For a full year I owned both a floating thermometer and a digital probe, and I kept “forgetting” to use the probe because the floater was easier to read. Then one February morning the floater said 54°F and the water felt wrong — heavy, biting, the kind of cold that makes your breath catch. The probe said 44°F. My chiller had been working overtime in a cold snap and the floater, bobbing in a sun-warmed surface layer, hadn’t noticed. Now the probe check is as automatic as the towel. Trust the tool that measures where your body actually goes.
Accuracy at a glance
Typical real-world accuracy of each cold plunge thermometer type (longer bar = more accurate):
*Chiller displays are often precise but measure at the unit’s sensor, not the water around your body — hence the lower practical score.
| Thermometer type | Speed | Typical cost | Best for |
|---|---|---|---|
| Digital probe | 60–90 sec | $12–$25 | Daily honest readings; best value |
| Smart WiFi/Bluetooth | Continuous | $40–$80 | Chiller owners who love data & alerts |
| Floating | 2–3 min | $8–$15 | Quick glance before stepping in |
| Dial (bimetal) | 2–3 min | $10–$20 | Battery-free simplicity |
| Infrared gun | Instant | $20–$40 | Spot-checking different areas fast |
| Chiller display | Continuous | Included | Machine monitoring (verify with probe!) |
| Stick-on strip | 1–2 min | $4–$8 | Rough idea only — upgrade soon |
03Where to Place Your Cold Plunge Thermometer: The 3 Placement Rules
Here’s the uncomfortable truth I learned with my three-spots-three-temperatures experiment: the best cold plunge thermometer in the world gives you a bad number if you put it in the wrong place. Water stratifies, ice drifts, and chiller outlets create cold jets. Three rules fix 90% of bad readings:
Rule 1: Measure where your body goes. Mid-tub, mid-depth — roughly where your torso will be. That’s the temperature that matters. A reading taken at the surface or in a corner is trivia, not data.
Rule 2: Stay away from the ice dump and the chiller return. Fresh ice creates a localized cold pocket; the chiller outlet blasts super-chilled water in a jet. Both lie to you. Give fresh ice at least 10–15 minutes to melt and mix (or stir the water gently) before you trust a reading.
Rule 3: Give it time to settle. Probes need 60–90 seconds, dials and floaters 2–3 minutes. Reading a thermometer the instant it hits the water is like judging a plunge by the first three seconds — technically a measurement, practically useless.
Before every session I give the water 10 slow stirs with my hand — like a giant, freezing cocktail. It breaks up stratification and melts the last ice slivers. Then I drop the probe in the middle and start my breathing routine while it stabilizes. By the time I’m calm, the number is honest. Two minutes of patience, zero dollars of gear.
04How to Calibrate a Cold Plunge Thermometer With an Ice Bath
Every thermometer — even a good one — deserves a reality check now and then. The beautiful part: you can verify accuracy for free, in your kitchen, using physics. A properly made ice-water bath sits at exactly 32°F (0°C) at sea level. If your cold plunge thermometer reads 34°F in it, you now know it reads 2°F high, and you can mentally correct every future plunge.
- Fill a large glass or bowl with crushed ice (not cubes — crushed gives better contact), then add just enough cold water to fill the gaps. You want a thick slush, not ice floating in water.
- Stir well and let it sit for 2–3 minutes so the mixture equalizes.
- Submerge your thermometer’s probe in the center of the slush, not touching the sides or bottom. Stir gently.
- Wait for the reading to fully stabilize, then read it. It should say 32°F (0°C).
- If it’s off by more than your thermometer’s stated accuracy, note the offset (e.g., “reads 2°F high”) and apply it to future readings — or adjust the calibration nut if your dial thermometer has one.
Do this check when you first buy a thermometer, after a battery change, and once a season after that. ThermoWorks — the company that makes the thermometers half the food industry trusts — publishes a detailed walkthrough of how to make a proper ice bath for thermometer testing, including the crushed-ice detail most people skip (it’s the difference between 32.0°F and 34°F).
Why crushed ice and not cubes? It’s about thermal contact. Cubes leave large water pockets that can sit above freezing; crushed ice maximizes ice-to-water surface area so the whole mixture truly equalizes at the melting point. This is the same reference method calibration labs use — you’re borrowing laboratory physics for your backyard tub.
05Cold Plunge Thermometer FAQ
What is the best cold plunge thermometer for beginners?⌄
A simple digital probe thermometer ($12–$25) is the best cold plunge thermometer for beginners. It’s accurate to about ±1°F, needs no app, and teaches you the most important habit: measuring mid-depth, mid-tub, after the water has settled. Skip the fancy smart thermometer until you’ve built the habit — accuracy comes from method, not money.
How accurate should a cold plunge thermometer be?⌄
Aim for ±1–2°F (±0.5–1°C). That’s plenty to distinguish the zones on our cold plunge temperature chart and keep sessions consistent week to week. Anything claiming ±0.1°F is overkill for plunging — and anything worse than ±3°F (like most stick-on strips) can quietly shift you an entire intensity zone.
Where do you put a thermometer in a cold plunge tub?⌄
Place your cold plunge thermometer mid-depth in the center of the tub — where your torso will be — away from fresh ice and the chiller return jet. Avoid the tub walls (they conduct ambient heat) and the surface layer (warmed by air and sun). Give the water a gentle stir first, then let the thermometer stabilize: 60–90 seconds for digital probes, 2–3 minutes for dial or floating types.
Can I use a meat thermometer for my cold plunge?⌄
Yes — a digital instant-read meat or kitchen thermometer works surprisingly well as a cold plunge thermometer, since most read accurately down to at least 32°F. Just verify it in an ice bath first (it should read 32°F/0°C), don’t submerge any part that isn’t rated waterproof, and dry it afterward to protect the electronics. It’s the best “I need an answer today” option.
Why does my cold plunge thermometer show different readings in different spots?⌄
Because the water genuinely is different temperatures in different spots — that’s stratification. Cold water is denser and sinks, fresh ice creates cold pockets, and chiller outlets blast chilled jets. Differences of 3–8°F across one tub are normal in still water. Stir gently, wait a few minutes after adding ice, and always measure mid-depth in the center for your “official” number.
Do I need a cold plunge thermometer if my chiller already shows the temperature?⌄
Yes — at least for periodic verification. A chiller’s display reports the temperature at its own sensor (usually the outlet or inside the unit), which can differ from the water around your body by several degrees. Check our chiller guide for buying advice, but whatever you own: compare its display against a probe in the middle of the tub once a season. Trust, but verify.
YOUR FIELD KIT · THE HONEST-READING CHECKLIST
- One digital probe thermometer (your source of truth)
- Measure mid-depth, mid-tub — where your body goes
- Stir the water; wait 10–15 min after adding ice
- Let the reading stabilize (60–90 sec digital, 2–3 min analog)
- Ice-bath calibration check once a season (should read 32°F / 0°C)
- Fresh battery at the first sign of “creeping” readings
- Log your real temps for two weeks — you’ll spot patterns fast
Here’s my parting thought after two years of obsessing over this: the thermometer didn’t just make my plunges more accurate — it made them more honest. There’s a quiet confidence in knowing your 50°F is actually 50°F, and a humility in discovering it wasn’t. Either way, you’re dealing with reality instead of a comforting number on a screen. And in a practice that’s fundamentally about meeting reality head-on, that feels exactly right.
If temperature control is your current rabbit hole, keep going: our water treatment guide keeps that perfectly-measured water clean, and our winter plunging guide covers what happens to your readings when the air itself is freezing.
This article is for informational purposes only and is not medical advice. Cold water immersion carries real risks — including cold shock response, hypothermia, and cardiovascular stress — especially at very low temperatures or with extended exposure. The temperature ranges discussed here are general guidelines, not prescriptions. If you have a heart condition, high blood pressure, Raynaud’s, or any medical concern, talk to your doctor before plunging, and never plunge alone at extreme temperatures.
→Keep Exploring
Best Cold Plunge Chiller →How to choose the right size and features, display accuracy included.
Cold Plunge Water Treatment →5 ways to keep that perfectly-measured water clean and safe.
Cold Plunge in Winter →7 rules for safe outdoor plunging when the air is freezing too.

Related Articles
Cold Plunge Accessories: 7 Add-Ons Worth Buying (and 3 to Skip)
The short version If you buy nothing else, buy these three cold plunge accessories: an insulated cover, a…
Read Guide
Cold Plunge Water Treatment: 5 Ways to Keep Your Water Clean and Safe
Safety note before you read on: This guide covers general cold plunge water treatment options, including filters, UV…
Read Guide
Best Portable Cold Plunge: What to Look for Before You Buy
A quick note before you read on: This guide covers what to look for and general expectations when…
Read Guide