
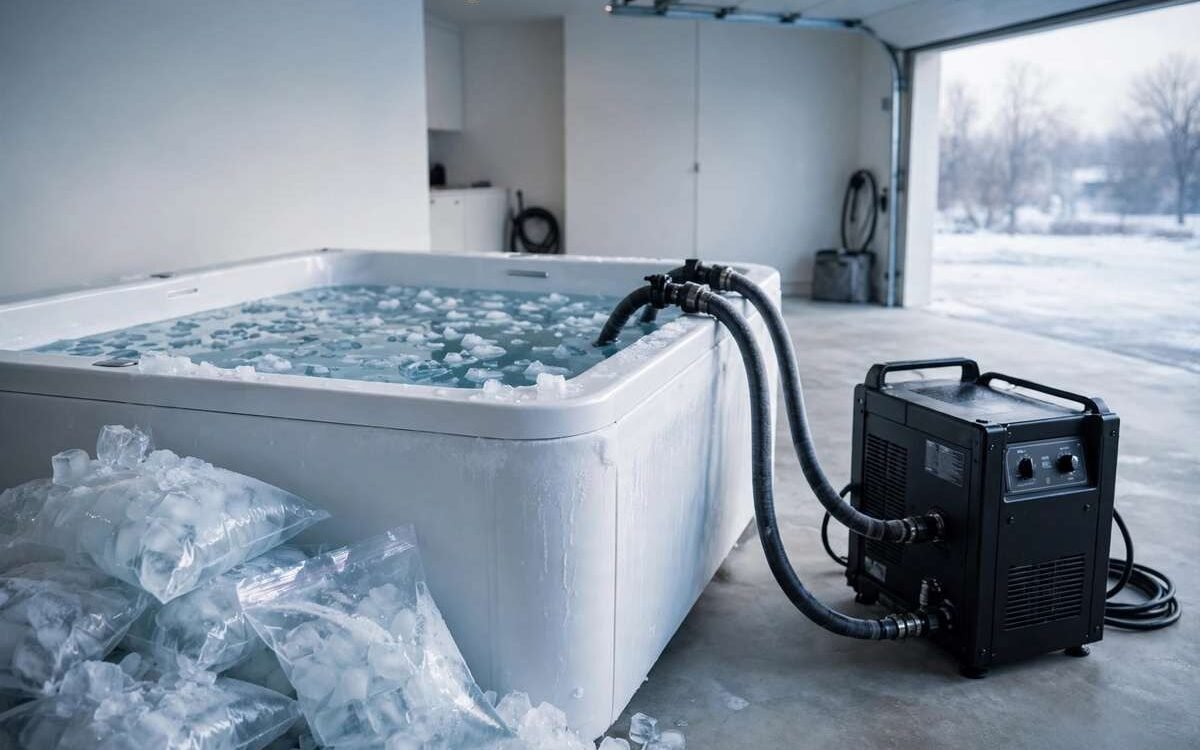
Cold Plunge Water Chiller vs Ice: Which Is Better?
Same cold water, two very different ways to get there. One is cheap and simple. The other is automatic and steady. Here is the honest head-to-head on cost, temperature, and daily effort.
ICE ❄ VS ❄ CHILLER
The short answer
Ice wins on price today; a chiller wins on convenience every day after. A cold plunge water chiller vs ice comparison comes down to how often you plunge. If you plunge once a week or you are still testing the habit, ice is the smarter start — a few bags per session and no machine to buy. If you plunge three or more times a week, a chiller usually costs less over a year, holds the same temperature every session, and is ready the moment you are. There is no single winner — there is a winner for your routine.
Every cold plunge needs cold water, and there are only two practical ways to make it at home: dump in ice, or run a chiller. Both get you to the same target — most guides put the sweet spot at 50–59°F (10–15°C) — but they feel nothing alike in real life. Ice means a trip to the store, heavy bags, and water that warms up while you sit in it. A chiller means a machine humming in the corner and water that is exactly the temperature you set, every single time.
This guide compares the two side by side, with real numbers from current buying guides and cost breakdowns. Prices are US retail figures and they move with stores, seasons, and regions, so treat every number here as a range, not a promise. The goal is simple: help you pick the method that fits your budget, your schedule, and how often you actually plan to plunge.
How Ice Works: Cheap to Start, Costly to Repeat
Ice is the original cold plunge. You fill a tub with cold tap water, pour in bagged ice, stir, check the temperature, and get in before it melts. There is no machine, no power socket, and no installation. A stock tank or an inflatable tub and a few bags of ice are all you need, which is why almost everyone starts here.
The catch is volume. Cooling water takes a surprising amount of ice. Most guides quote 20–40 pounds of ice per session for a typical home tub, and up to 40–80 pounds in a warm climate or a large tub. One detailed ice calculator puts it at about 50 pounds to cool 100 gallons of 60°F tap water down to 50°F, and a common rule of thumb is about half a pound of ice per 10 gallons for every degree you want to drop. A 100-gallon stock tank can need 150–200 pounds for the first cool-down from room temperature on a warm day — that is a car boot full of bags.
Then there is the money. Bagged ice usually sells for $2–$4 per 7–10 lb bag, which puts a single session at roughly $6–$24 in ice alone, depending on your tub size and climate. At daily use, that adds up to about $120–$250 a month — over a thousand dollars a year just to keep water cold. And the price per pound, roughly $0.25–$0.60 at most stores, is only half the story. The other half is the errand: driving to buy ice, hauling heavy bags, dumping them in, stirring, waiting for the temperature to settle, and then draining and wiping a heavy tub afterwards. One detailed comparison calls it honestly: the ice-bath ritual is 20–40 minutes of work before you get wet.
Ice also has a built-in flaw. It melts. The water is coldest the moment the last cube dissolves, and it warms from that point on — from the air, from the tub, and from your body. A session that starts at 50°F can end several degrees warmer, and the next person in line gets a different plunge than the first. If you want a repeatable routine, that drift matters. Our cold plunge temperature chart shows the ranges most people aim for, and hitting the same range twice with ice takes practice and a thermometer. That is why a cold plunge thermometer is the first accessory most ice users end up buying.
None of this makes ice a bad choice. It makes ice a testing choice. If you are not sure cold plunging is for you, ice lets you find out for the price of a few bags — no machine, no commitment. Many long-term plungers started exactly this way.
How a Chiller Works: Pay Once, Plunge Anytime
A chiller is a small refrigeration unit that pumps water out of your tub, cools it, filters it, and returns it — over and over, all day. You set a temperature, and the machine holds it. There is no store run, no hauling, and no waiting. You lift the lid and get in.
The price is the hurdle. Standalone chillers span a wide range: budget aquarium-style units run about $400–$700, solid mid-range purpose-built units run about $1,200–$1,800, and premium brand-name chillers list at $3,599–$3,999.99 (checked October 2026). A complete tub-and-chiller setup typically costs $1,500–$6,000, while a tub you fill with ice costs $80–$300. The chiller is usually half to two-thirds of any chilled setup, so it pays to price the chiller first and choose the tub around it. Our best cold plunge chiller guide explains how to match a unit’s horsepower to your tub size and climate — that match matters more than the brand name.
Running costs are where the chiller fights back. A typical home chiller costs roughly $15–$51 a month in electricity at 8 hours a day at the July 2026 US average of 18.31 cents per kWh, and most home setups land between $25 and $60 a month. Per session, that works out to about $0.50–$1.50 in electricity — a fraction of what ice costs. The exact bill depends on your local electricity rate, how well your tub is insulated, whether you keep the lid on, and how hot your climate is. A chiller in a cool garage with a good lid cycles on and off; the same unit in a hot garage works much harder. The formula is simple: watts divided by 1,000, times the hours the compressor actually runs each day, times 30 days, times your price per kWh.
What you buy with that money is consistency. A chiller holds your set temperature within a degree or two, session after session, no matter who plunges first. It also filters the water continuously, which keeps it clearer for longer — one of the reasons our cold plunge maintenance tips are simpler for chiller owners than for ice users. The trade-offs are real too: a chiller needs a power socket (ideally a dedicated circuit with GFCI protection), it makes a low hum while it runs, and a cheap underpowered unit on a big tub cools slowly and frustrates everyone. Size it right, and it disappears into the background of your routine.
❄ Ice
The try-it-first method. Fill the tub, add bags of ice, stir, and plunge. No machine, no power, no installation.
Upfront: $80–$300 for the tub
Per session: $6–$24 in ice
Best for: testing the habit, occasional plunges, and anyone on a tight budget.
⚙ Chiller
The set-and-forget method. Set a temperature once. The machine cools, filters, and holds it — ready whenever you are.
Upfront: $400–$4,000 for the unit
Per session: $0.50–$1.50 in electricity
Best for: three or more sessions a week, shared tubs, and exact temperatures.
Cold Plunge Water Chiller vs Ice: The Head-to-Head
Here is the whole comparison in one place. Read down the left column, pick the rows that matter most to you, and the right choice usually becomes obvious.
| Bagged Ice | Water Chiller | |
|---|---|---|
| Upfront cost | $80–$300 for a tub; ice bought per session | $400–$4,000 for the unit; $1,500–$6,000 for a complete tub-and-chiller setup |
| Cost per session | $6–$24 in ice | $0.50–$1.50 in electricity |
| Monthly cost (3×/week) | About $75–$290 in ice | About $25–$60 in electricity |
| Temperature control | Drifts warmer as ice melts; hard to repeat exactly | Holds your set temperature within a degree or two |
| Ready when you are | No — 20–40 minutes of buying, hauling, and waiting | Yes — lift the lid and get in |
| Daily effort | Buy, haul, dump, stir, drain, wipe | Almost none — check the filter and water weekly |
| Maintenance | Drain and clean after most sessions; water rarely lasts | Filter changes and sanitizer; water lasts weeks with care |
| Noise and power | Silent; no power needed | Low hum while cooling; needs a power socket, ideally GFCI-protected |
| Best for | Beginners, once-a-week plungers, tight budgets | Regular plungers, families, exact temperatures |
The table tells the story in one line: ice is cheap to start and expensive to repeat; a chiller is expensive to start and cheap to repeat. Everything else — temperature, effort, maintenance — follows from that one fact.
The Real Cost Over a Year
Sticker prices lie by omission. The honest comparison is the first year, and then every year after it. Here is the arithmetic, using the ranges above. Your local prices will differ, but the shape of the answer holds in most places.
Three sessions a week with ice: 3 sessions × $6–$24 = $18–$72 a week, or $936–$3,744 a year in ice alone.
Three sessions a week with a chiller: a $1,099 mid-range unit plus about $30 a month in electricity = roughly $1,459 in year one, then about $360 a year after that.
Once a week with ice: $6–$24 a week, or $312–$1,248 a year.
Once a week with a chiller: the same $1,459 in year one — more than a year of ice at the low end.
That is why the break-even point depends on frequency. At daily use, a chiller usually pays for itself in one to two seasons, according to one detailed cost breakdown — and at twice a week, it does not. At three sessions a week, most people cross the line somewhere in year one or two, depending on how much ice their tub needs and what ice costs near them. At once a week, ice stays cheaper for years, and the chiller only wins if you value the convenience more than the money.
There is one more cost that never shows up on a receipt: the trips. Ice is not just $6–$24 a session — it is the drive, the cooler, the wet car boot, and the heavy lifting. If you plunge before work, that 20–40 minute ritual is the difference between plunging and skipping. A chiller removes the ritual entirely, and the sessions you actually do are worth more than the sessions you plan. If you are weighing the full picture, our how much does a cold plunge cost guide breaks down every line item — tub, chiller, electricity, filters, and sanitizer — so you can price your own setup before you spend anything.
Temperature: The Part Ice Cannot Promise
Ask any regular plunger what matters most, and the answer is rarely the cold itself — it is knowing what the cold will be. A chiller gives you that. You set 50°F, and the water is 50°F on Monday, Wednesday, and Friday, for you and for anyone else who uses the tub. That repeatability is what turns a cold shock into a routine you can measure and adjust.
Ice cannot promise the same. Melting one pound of ice absorbs about 144 BTU of heat, which sounds like a lot until you remember that a tub holds hundreds of pounds of water, plus your body heat, plus the warm air above it. The water starts at your target and climbs from the moment you get in. The first session of the day is the coldest; the second is a few degrees warmer; and if you guess the ice wrong, you either shiver through water that is colder than planned or sit in water that never quite gets there.
That drift is not dangerous — it is just imprecise. For most people, a few degrees either way makes no real difference to how the plunge feels. But if you are following a protocol, comparing sessions, or sharing the tub with family, precision starts to matter. And there is a practical point too: with ice, you must measure the water every time before you get in. A thermometer is cheaper than a bag of ice, and it is the one tool every ice user needs. With a chiller, the display tells you the temperature before you lift the lid.
Session length plays into this as well. Most evidence-based routines suggest short plunges of a few minutes each — our how long should you cold plunge guide covers the timing in detail — and short sessions are exactly where a chiller shines, because the water is ready the moment you are. With ice, a two-minute plunge can hide inside a thirty-minute preparation.
Convenience and Daily Effort
Be honest with yourself about your mornings. Ice asks for effort every single time: remember to buy it, drive to get it, carry it, dump it, stir it, wait, plunge, then drain and dry the tub. Do that three times a week and it becomes a part-time job. Do it once a week and it feels like a small adventure. The method that fits your life is the one you will actually keep doing.
A chiller asks for almost nothing day to day. You walk up, lift the lid, and get in. The effort moves to the background: a weekly check of the filter, a quick water test, and a deeper clean every few weeks. The machine does the boring part while you do the plunging part. That is the real product a chiller sells — not cold water, but the removal of friction.
There are trade-offs on the chiller side too. It needs power, so it needs a socket near the tub and, ideally, a dedicated circuit with GFCI protection — an electrician visit can add a few hundred dollars if your setup is not ready. It hums while it cools, which matters if the tub sits next to a bedroom window. And if the power goes out, the water warms like any other tub. Ice has none of these problems: it works anywhere, silently, with no socket at all. A portable tub with ice is the only setup you can take camping, and our DIY cold plunge setup guide shows how far a simple stock tank and a few bags can go when you are just starting out.
Maintenance: What Each One Asks of You
Ice keeps water simple and short-lived. Most ice users drain the tub after every session or two, because still water with no filtration turns cloudy fast, especially in warm weather. That means a drain, a wipe, and a refill each time — more work, but no chemicals, no filters, and no parts to replace. If you like the idea of fresh water every plunge, ice gives it to you by default.
A chiller keeps water longer and asks for a routine instead. The filter needs rinsing or replacing on a schedule, the water needs sanitizer and occasional testing, and the tub needs a proper clean every few weeks. In return, the same water can last for weeks, and the tub is always ready. The running cost of filters and sanitizer is modest — roughly $15–$40 a month for filters and sanitizer combined on a typical home setup — but it is a real line in the budget, and skipping it is how chiller water turns green.
Neither method is maintenance-free. Ice trades machine care for constant draining; a chiller trades draining for filter and water care. Pick the chore you mind less. If you want the full routine for either setup, the cold plunge maintenance tips guide lays out a simple weekly plan that works for both.
Who Should Pick Ice?
Pick ice if any of these sound like you. You are trying cold plunging for the first time and you are not sure it will stick. You plunge once a week or less. Your budget is tight and the idea of spending hundreds on a machine feels wrong before you know you love the habit. You have no power socket near the tub, or you want a setup you can move, take outside, or take on a trip. You like fresh water every time and you do not mind the errand.
The smartest ice setup is a simple one: an insulated tub or stock tank, a lid to slow the warming, a thermometer, and a plan for where the ice comes from. Freeze your own water in jugs if you have freezer space — a frozen gallon jug is about 8 pounds of reusable ice — and buy bags only when you need them. Start there, plunge for a month, and let the habit prove itself before you spend more. If you are still plunging after thirty days, you have your answer, and the chiller question answers itself.
Who Should Pick a Chiller?
Pick a chiller if any of these sound like you. You plunge three or more times a week and the ice bill is already annoying you. More than one person uses the tub and you want the same temperature for everyone. You plunge early in the morning and you will not do a twenty-minute ice ritual before work. You want exact temperatures because you are following a routine or tracking how you feel. Or you simply want the tub to be ready whenever you are, with no planning at all.
When you buy, size matters more than brand. Match the chiller’s horsepower to your tub’s volume and your climate — an underpowered unit on a big tub in a hot garage cools slowly and runs constantly, which costs more in electricity and patience. Budget for the extras too: a pump if the unit does not include one, hoses and fittings, a filter, sanitizer, and a test kit. A realistic first-year budget for a 100–150 gallon tub runs about $1,100–$2,500 all in. And if you are choosing the tub at the same time, our cold plunge tub buying guide walks through materials, sizing, and insulation — an insulated tub makes any chiller’s job easier and its bill smaller.
Our Ready-Made Pick: Plunge Chill
If the chiller side of this comparison is winning you over but the shopping feels like a lot, there is a simpler route: a ready-made chilled setup. Plunge Chill is one such option — a complete cold plunge with its own chiller, designed to hold a steady temperature without ice, bags, or a DIY build. It will not suit every budget or every tub size, and you should still check its capacity against your needs before ordering, but as a starting point for a set-and-forget setup it is worth a look.
See Plunge Chill and check the current details →
Disclosure: this is an affiliate link. If you buy through it, we may earn a small commission at no extra cost to you. It helps keep this site running, and it never affects our advice — ice is still the right call for plenty of people, whatever you buy.
The Verdict
Start with ice. Switch to a chiller when the habit sticks. That is the honest answer for most people. Ice costs almost nothing to try, and a month of regular plunging tells you everything you need to know about whether you will keep doing it. Once you are plunging three or more times a week, a chiller stops being a luxury and starts being the cheaper, easier, steadier option — and the sessions you never skip are worth more than the money either way. A cold plunge water chiller vs ice is not a debate with one winner. It is a question with a right answer for your routine, your budget, and your mornings.
Frequently asked questions
1Cold plunge water chiller vs ice: which is cheaper?
Ice is cheaper to start and a chiller is cheaper to repeat. A single ice session costs about $6–$24 in bags, while a chiller session costs about $0.50–$1.50 in electricity. At once a week, ice usually wins for the first year or two. At three or more sessions a week, a chiller typically pays for itself within one to two years, because the ice bill adds up to $936–$3,744 a year.
2How much ice do I need for one cold plunge session?
Most guides quote 20–40 pounds per session for a typical home tub, and up to 40–80 pounds in a warm climate or a large tub. About 50 pounds cools 100 gallons of 60°F tap water to 50°F. A handy rule of thumb is about half a pound of ice per 10 gallons for every degree you want to drop — so measure your tub, check your tap temperature, and always confirm with a thermometer before you get in.
3How much does a cold plunge chiller cost to run each month?
A typical home chiller costs roughly $15–$51 a month in electricity at 8 hours a day at the US average rate, and most home setups land between $25 and $60 a month. The exact figure depends on your local electricity price, your tub’s insulation, whether you keep the lid on, and how hot your climate is. Add roughly $15–$40 a month for filters and sanitizer on top.
4Does a chiller keep the water colder than ice?
Not colder — steadier. Ice can make water very cold for a short time, but it melts and the water warms through the session. A chiller holds whatever temperature you set, within a degree or two, for as long as it runs. If you want the same 50°F every session, a chiller is the only method that guarantees it.
5Is ice better for beginners trying cold plunging for the first time?
Yes, for most beginners. Ice lets you try cold plunging for the price of a few bags, with no machine to buy and no installation. Plunge for about a month first. If you are still going after thirty days, the habit has proven itself — and that is the right moment to consider a chiller.
6Can I use ice and a chiller together?
Yes, and some people do exactly that. Ice gives a chiller a head start on the first cool-down of a big tub, and it helps on very hot days when the chiller is working hard. Once the water reaches your set temperature, the chiller takes over and holds it there. Just do not add ice on top of a running chiller every session — at that point the chiller alone is doing the job, and the ice is only adding cost and mess.
Whichever side you choose, the best cold plunge is the one you actually do. Start simple, keep it regular, and let the habit — not the hardware — decide your next step.

Related Articles
Best Cold Plunge Tub for Small Spaces: How to Pick a Compact Tub That Fits
Gear & Reviews · Small-Space Guide Best Cold Plunge Tub for Small Spaces: How to Pick a Compact…
Read Guide
Cold Plunge Tub Covers: How to Choose the Right One (and Why Your Tub Needs One)
Gear & Reviews Cold Plunge Tub Covers: How to Choose the Right One (and Why Your Tub Needs…
Read Guide
Cold Plunge Accessories: 7 Add-Ons Worth Buying (and 3 to Skip)
The short versionIf you buy nothing else, buy these three cold plunge accessories: an insulated cover, a waterproof…
Read Guide